The allotment shortcut hiding in your recycling pile
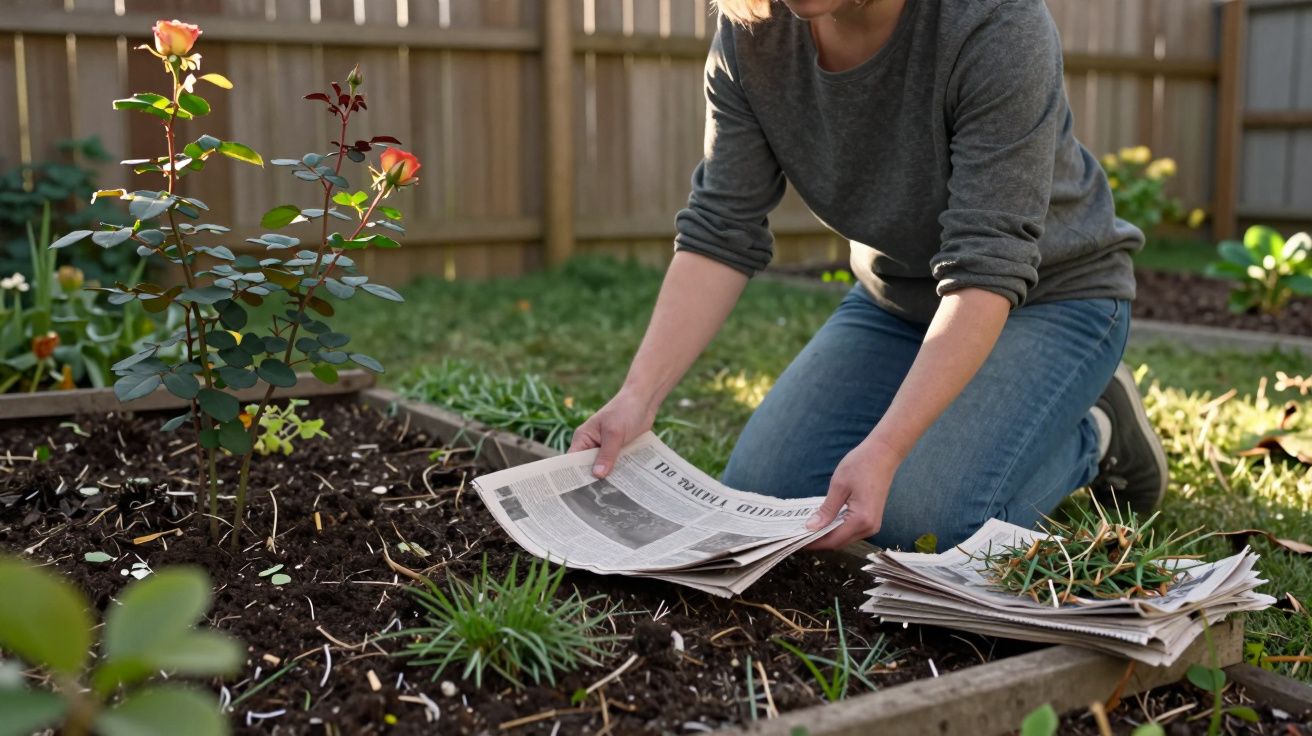
The border by the fence was meant to be a cottage‑garden dream. Now it’s a quilt of dandelions, dry patches and that one rose trying its best. The soil looks like stale cake. Every time you walk past with the washing basket, you clock it and think, “I’ll sort that at the weekend,” then don’t.
Most people assume the only fix is a boot‑full of compost bags and a heroic digging session. The trouble is, tired soil rarely wants more disturbance. It wants cover, moisture and something to eat. That’s where an old allotment habit quietly earns its keep: a stack of yesterday’s paper and the grass you were going to bin.
Laid right, newspaper and fresh mowings can smother weeds, feed the soil and fake a fresh bed in a single weekend. It looks almost too scruffy to work. By Monday, it looks like you planned it.
The classic trick: newspaper plus mowings
Allotment holders have done this for decades under different names: sheet mulching, lasagne gardening, “just sling some papers down”. The principle is simple. You build a soft, shallow “sandwich” over your tired bed:
- A base of flattened weeds and existing soil.
- A layer of plain newspaper, several sheets thick.
- A fluffy quilt of grass clippings and any other mulchy odds and ends you have.
The newspaper blocks light, starving most weeds before they get ideas. The grass clippings and other mulch keep everything damp and slowly turn into food. Worms do the dragging, shredding and mixing that you’d otherwise do with a spade.
Reach for:
- Plain black‑and‑white newsprint, not glossy magazines or shiny inserts.
- Fresh grass clippings, ideally mixed with a bit of brown stuff like leaves or shredded cardboard.
- Any half‑bag of compost, leaf mould or old potting mix you’ve got loitering in the shed.
How to do it in a single weekend
You don’t need to clear the bed bare. You’re putting it under a duvet, not shaving it.
Mow, strim or chop everything down low
Trim weeds and old plants to ground level. Leave roots where they are unless they’re real thugs (bindweed, couch grass, ground elder – dig those out as best you can).Water the soil thoroughly
A good soak helps kick‑start soil life and stops the paper wicking moisture away from plant roots you keep. Think “after a decent rain”, not a token sprinkle.Lay the newspaper, overlapping generously
- Use 4–8 sheets thick.
- Overlap edges by at least 10 cm so weeds can’t find daylight seams.
- Soak the paper with a hose or watering can as you go. Wet paper clings to the ground and starts to soften.
- Use 4–8 sheets thick.
Add a 5–8 cm layer of grass clippings
Spread mowings in a loose, even layer. You want a breathable quilt, not a tight, steaming mat. If the grass is very wet and clumpy, mix in a little dry material (shredded cardboard, straw, dry leaves) to fluff it up.Top with something prettier (optional but nice)
A final 3–5 cm of compost, leaf mould or even old soil from pots:- Hides the “I’ve carpeted my border” look.
- Gives you a nicer surface to plant into.
- Helps hold the grass in place on windy days.
- Hides the “I’ve carpeted my border” look.
Plant now or later
- For sturdy plants (courgettes, pumpkins, brassicas, shrubs): cut a cross in the paper, peel it back and tuck the plant in with a handful of compost.
- For fine seeds (carrots, lettuce, annual flowers): leave a narrow strip or pocket of bare soil without paper and sow there, mulching closely around once seedlings are up.
- For sturdy plants (courgettes, pumpkins, brassicas, shrubs): cut a cross in the paper, peel it back and tuck the plant in with a handful of compost.
Think of it as rolling out a soft, edible weed‑suppressing carpet over the bed you already have.
Why this scruffy sandwich works so well
Newspaper is just carbon‑rich plant fibre. Buried away from sunlight, it softens, tears and disappears into the soil over a few months. Grass clippings are nitrogen‑rich and break down fast. Put together, they form a rough‑and‑ready compost heap laid flat.
- Weeds lose the light, so most give up without chemicals or constant hoeing.
- Soil stays shaded and moist, which brings worms and fungi up to the surface.
- Worms drag paper and grass down, slowly loosening compaction without you turning a spade.
- You use what you’ve got: last week’s paper, this week’s mowing, that half‑bag of compost you forgot you bought.
A quick way to picture it:
| Layer | Material | Main job |
|---|---|---|
| Top | Grass, compost, leaves | Feed and protect soil, tidy the look |
| Middle | Newspaper | Block light, slow moisture loss |
| Base | Existing soil & roots | Anchor, hold life, become crumbly |
Common mistakes that quietly spoil it
The method is forgiving, but a few tweaks make the difference between magic and a mouldy mess.
Using glossy or heavily coloured paper
Stick to ordinary newsprint. Glossy magazines, shiny leaflets and plastic‑coated papers don’t break down cleanly and can shed microplastics.Grass layer too thick
A 15 cm heap of wet mowings can go slimy and anaerobic. Aim for a loose 5–8 cm, topped with something dryer if you have it.Grass from a weed‑killer‑treated lawn
If you’ve recently used a selective lawn weedkiller, don’t pile those clippings straight on food beds. Compost them separately for at least a few months first.Gaps at the edges
Light leaking in around the border gives dock and couch grass a corridor. Run the paper right up to the path edge and weigh it with stones, branches or a thick mulch line.Slug paradise around soft plants
Freshly mulched, damp beds can attract slugs. Keep the mulch a palm‑width back from lettuce, young dahlias and other favourites, and use whatever slug control you’re comfortable with.
Where this trick really shines
You can use the newspaper‑and‑mowings method almost anywhere you want a cleaner, kinder bed with less digging:
- Vegetable beds between rows of brassicas, squash, beans and sweetcorn.
- Around fruit bushes and trees, keeping trunks clear and mulching the root zone.
- Over ex‑lawn you want to turn into a border: mow low, paper, mulch, then plant through cuts after a few weeks.
- On scruffy paths between beds, with a thicker paper layer and woodchip on top.
Let’s be honest: nobody has time to double‑dig every new bed. This lets you convert tired or awkward patches into something useable, fast.
What you’ll see by next season
In the first few weeks, it just looks neat and mulched. The real shift starts quietly underneath.
Over a season or two:
- Soil that used to set like brick starts to crumble in your hand.
- You pull a weed and notice long, pale worm channels where a pan once was.
- Plants need less watering because the moisture isn’t flashing off bare, baked ground.
- You spend more time planting and picking, and less time chasing every seedling weed.
It won’t turn rubble into rich loam overnight, but it nudges almost any bed in the right direction with very little effort or expense.
FAQ:
- Is newspaper ink safe in the garden? Modern UK newspaper inks are typically soy or vegetable‑based and considered safe for home gardens. Avoid glossy supplements and plastic‑wrapped inserts, and stick to plain black‑and‑white pages where possible.
- How long does the paper last before it breaks down? A 4–8‑sheet layer usually softens within a few weeks and largely disappears within 6–12 months, depending on rain, soil life and how much mulch is on top.
- Can I use cardboard instead of newspaper? Yes. Plain, brown, tape‑free cardboard works brilliantly. Soak it well, overlap pieces generously, and treat it exactly as you would the newspaper layer.
- Will this attract rats or other pests? Newspaper and grass alone aren’t especially tempting. Problems tend to arise when cooked food waste or whole grains are mixed in. Keep it to plant material and you’re unlikely to see extra visitors.
- Can I do this around existing perennials without smothering them? Yes. Lay paper and mulch up to, but not over, the stems or crowns. For larger clumps, cut paper into crescents and tuck them in around the base, leaving a clear breathing space in the middle.


Comments
No comments yet. Be the first to comment!
Leave a Comment